
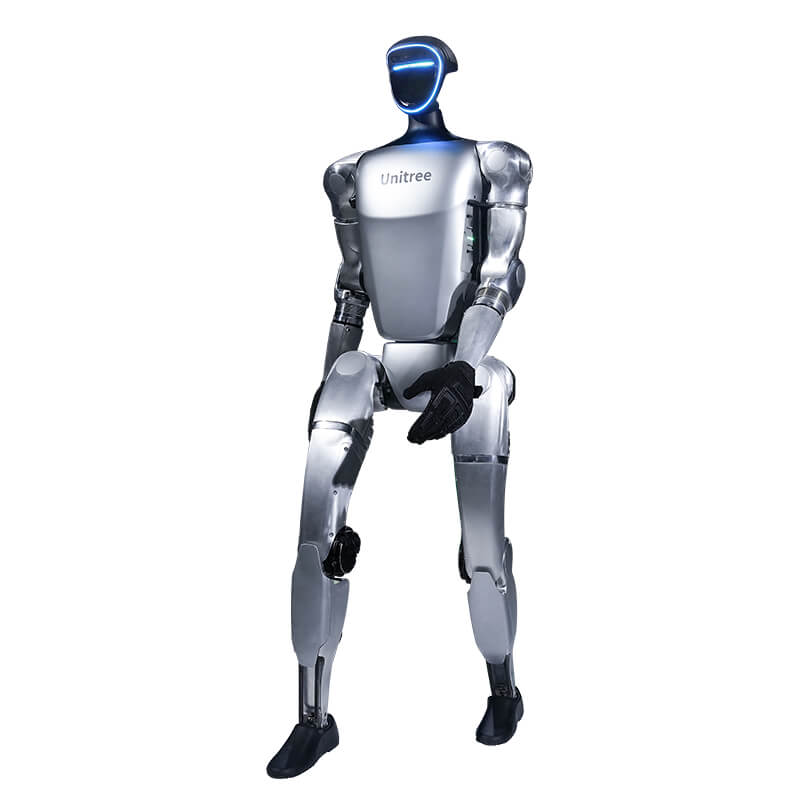
1. Required equipment
You will also need:
- An Android or iOS smartphone.
- A Windows 64-bit computer or an Apple Silicon Mac for advanced choreography.
- A Wi-Fi router with internet access.
- A USB-C cable for charging the controller.
- A Unitree account.
2. Download the required software
| Software | Purpose | Download |
|---|---|---|
| Unitree Explore | Robot connection and firmware updates | Download |
| UniStore | Download additional dance routines | Open UniStore |
| UniUni | Computer-based choreography and performance control | Download |
Python, ROS 2 and the Unitree SDK are not required for supported preconfigured dances.
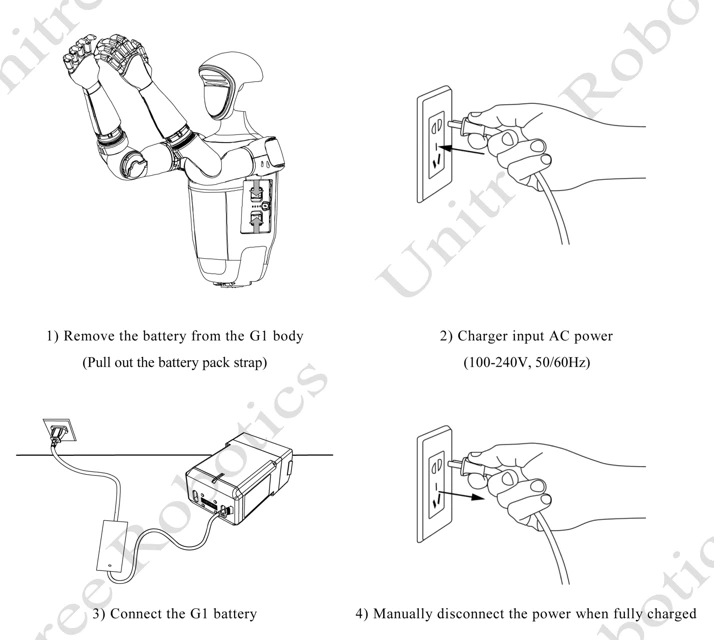
3. Charge the robot battery
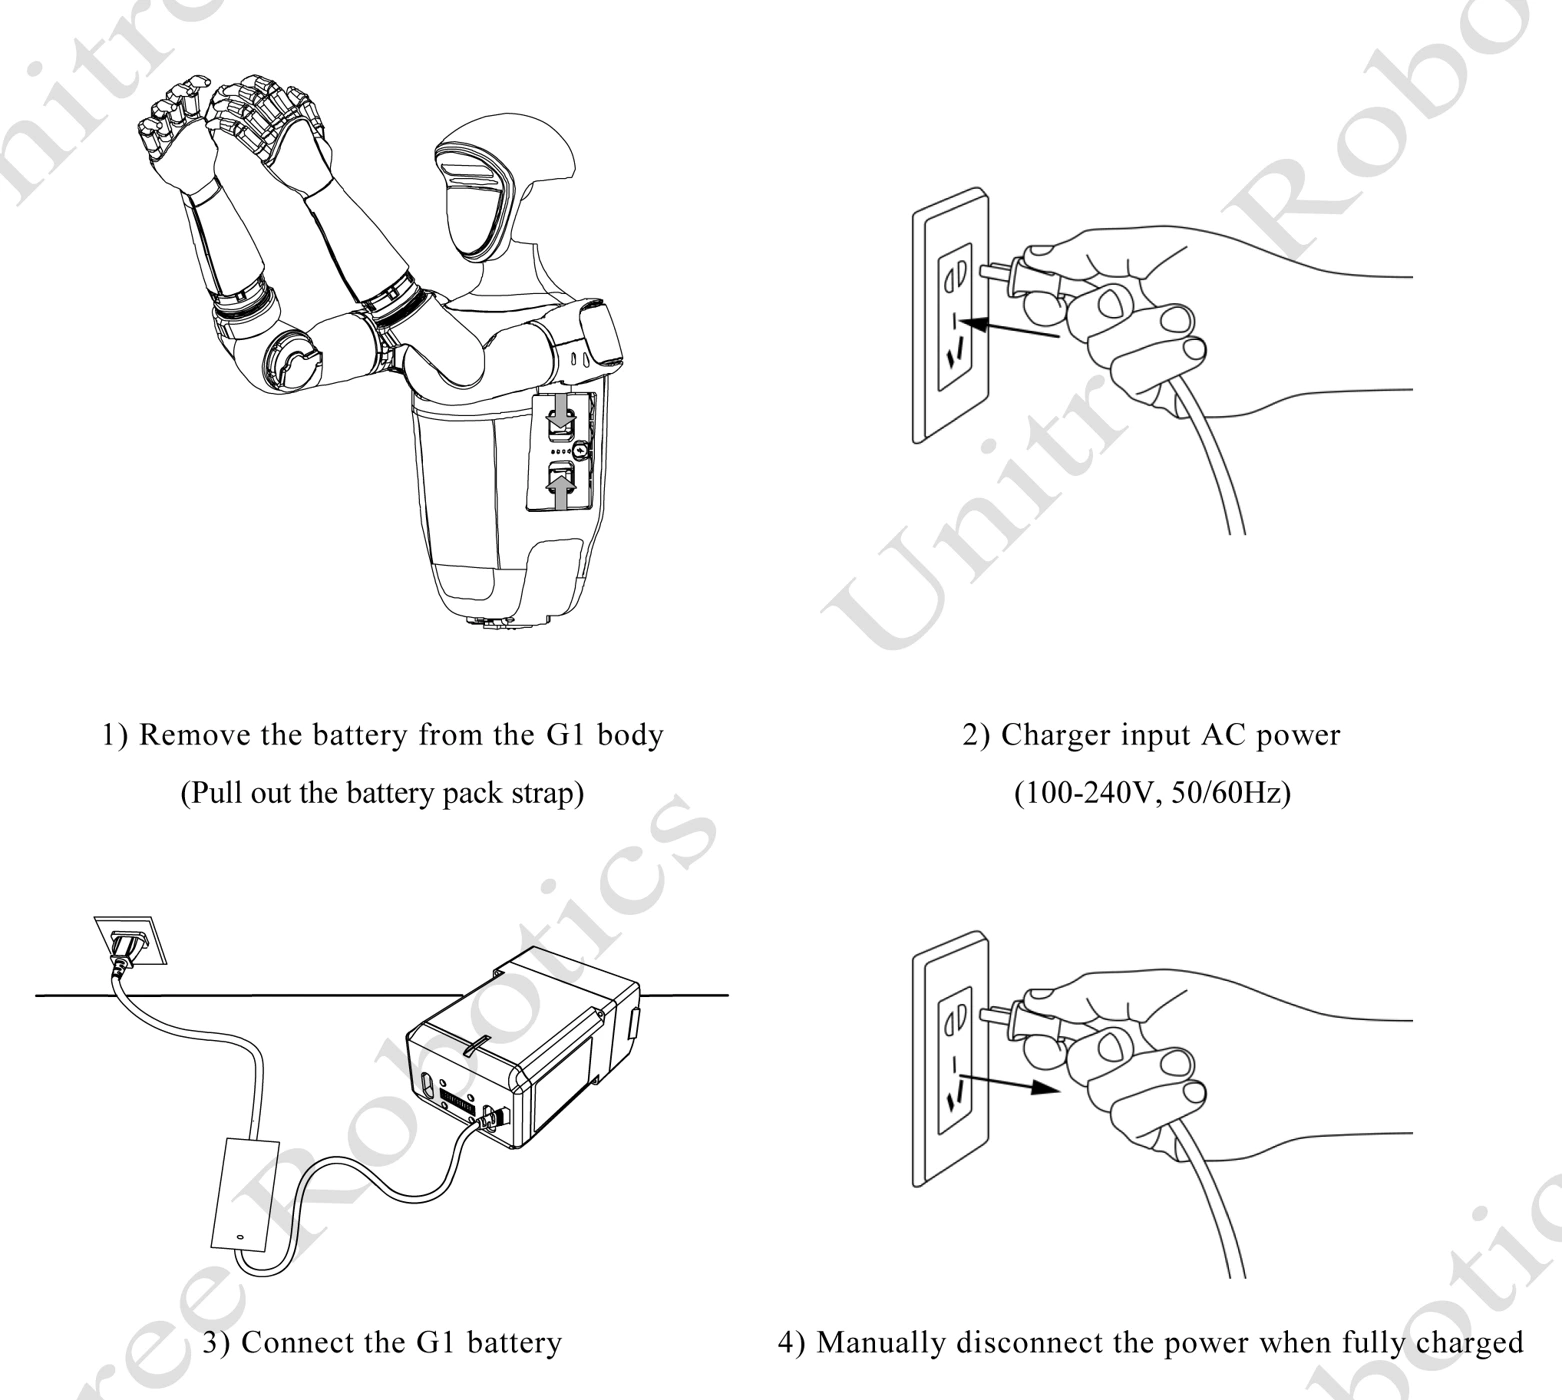
- Make sure the robot is powered off.
- Release and remove the battery from its compartment.
- Connect the original Unitree charger to a compatible wall socket.
- Connect the battery to the charger.
- Wait until charging is complete.
- Disconnect the charger.
- Insert the battery into the side of the robot with its power button facing backward.
- Verify that the locking mechanism is securely engaged.
Only use the official Unitree battery charger.
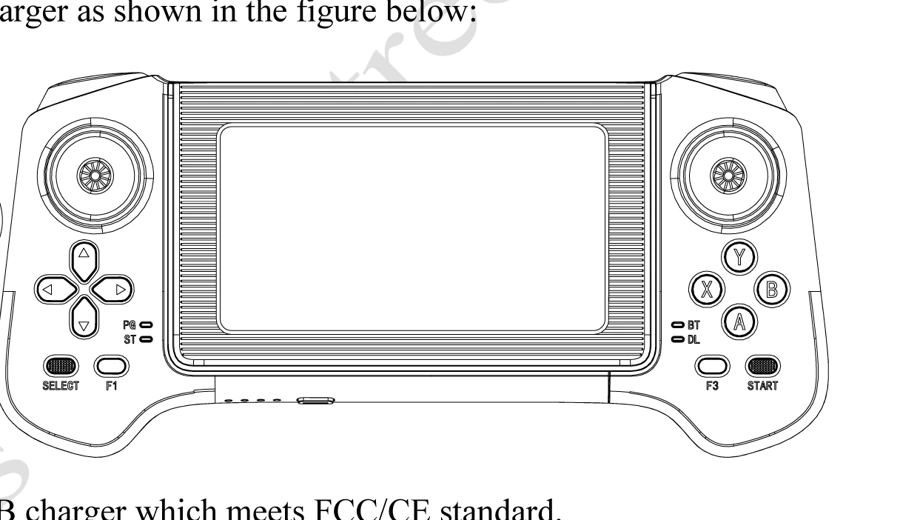
4. Charge the remote controller
- Switch off the remote controller.
- Connect a USB-C cable to the controller's charging port.
- Connect the cable to a compatible 5V/2A USB charger.
- Wait until charging is complete.
- Disconnect the USB-C cable.
5. Connect all devices
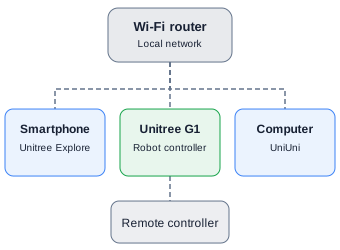
For standard dance installation, no USB or Ethernet cable needs to be connected directly to the robot. The smartphone and optional computer communicate with it over the network.
6. Power on the robot
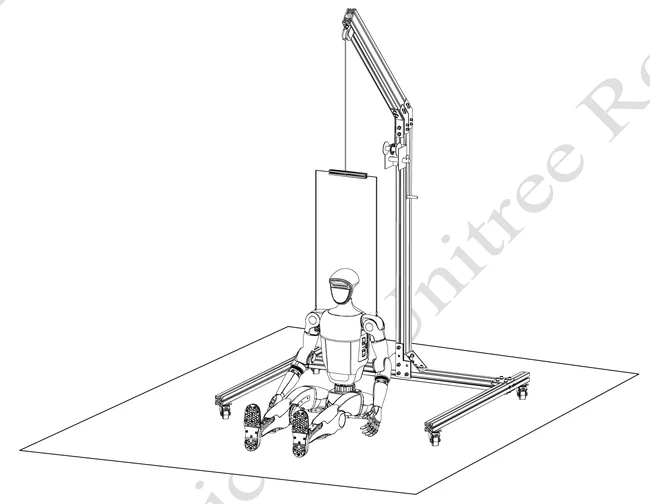
- Position the robot securely on its support frame or in its approved seated startup position.
- Short-press the battery power button.
- Press it again and hold for more than two seconds.
- Wait approximately one minute for initialization.
- Keep the robot supported until startup is complete.
Do not attempt to stand the robot manually without following the instructions for its hardware and firmware version.
7. Install and configure Unitree Explore
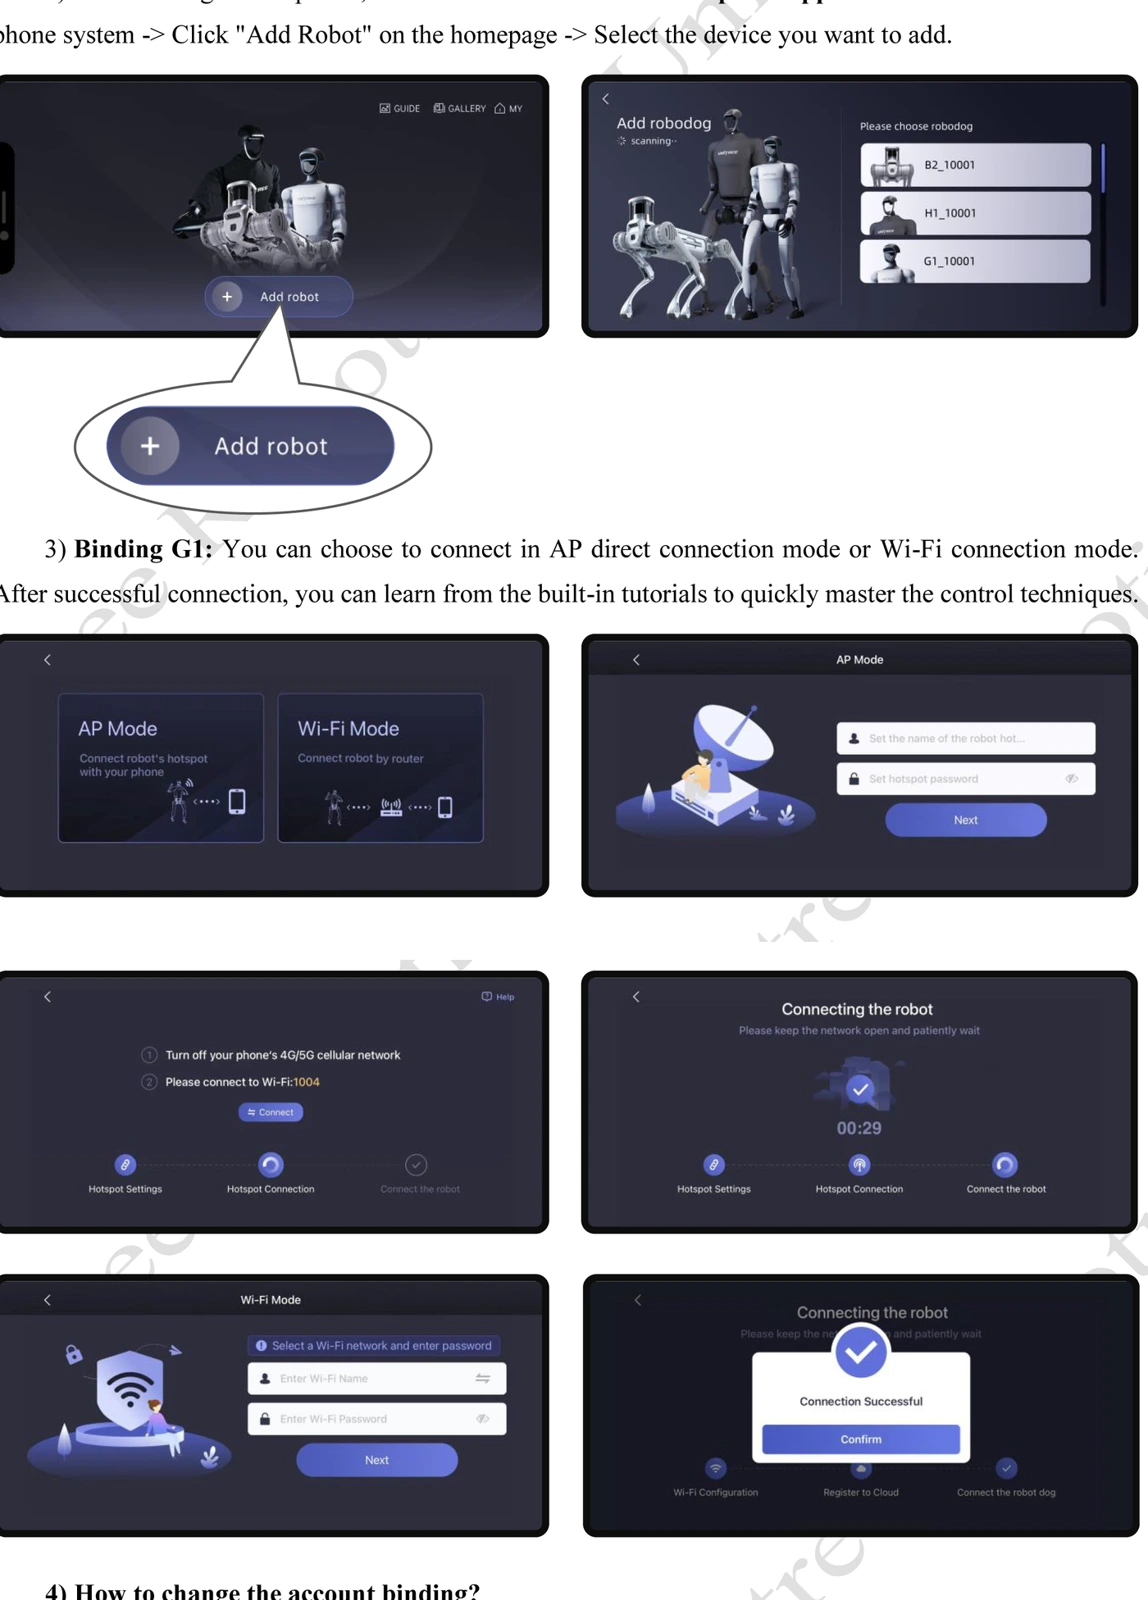
- Open https://www.unitree.com/app/g1/
- Select the international application version.
- Download the Android or iOS application.
- Install and open it.
- Log in using your Unitree account.
- Grant the requested Bluetooth and network permissions.
- Activate Bluetooth on your smartphone.
- Stay close to the robot.
- Select Add Robot.
- Select your G1 from the detected devices.
The application provides two connection modes:
- AP Mode: Connect directly to the robot.
- Wi-Fi Mode: Connect through a wireless network.
Choose Wi-Fi Mode for the network-based setup and OTA updates.
8. Configure the remote controller
- Short-press the controller's power button.
- Press and hold it again until the controller powers on.
- Open Unitree Explore.
- Open the connected robot's settings.
- Select Remote Control Settings.
- Enter your controller's identification code.
- Confirm the pairing.
- Check that the DL indicator is illuminated.
The DL indicator confirms the controller's connection to the robot.
9. Update the robot firmware
- Make sure the battery is sufficiently charged.
- Connect the robot to a stable internet connection.
- Open Unitree Explore.
- Select your connected G1.
- Locate the firmware or OTA update section.
- Check the installed firmware version.
- If a compatible update is available, select it and follow the installation prompts.
- Keep the robot powered on and connected during installation.
- Follow any restart instructions displayed by the application.
- Reconnect and verify the firmware version.
UniStore specifies these minimum requirements for the G1:
- Unitree Explore version 1.9.0.
- G1 OTA firmware version 1.4.8.
Install the latest compatible versions available for your robot.
10. Perform the first movement test
Before installing additional dances, verify that the robot can:
- Complete initialization.
- Enter its supported standing mode.
- Maintain balance.
- Walk forward.
- Walk backward.
- Turn.
- Stop correctly.
Monitor battery levels, joint temperatures and error notifications.
For example, the G1 V1.4 manual documents the following commands. Use them only if they match your robot's controller instructions.
| Command | Function |
|---|---|
| L2 + B | Damping mode |
| L2 + UP | Standing preparation |
| R2 + A | Locomotion control |
| Double press START | Standing/walking transition |
11. Test the built-in dance mode
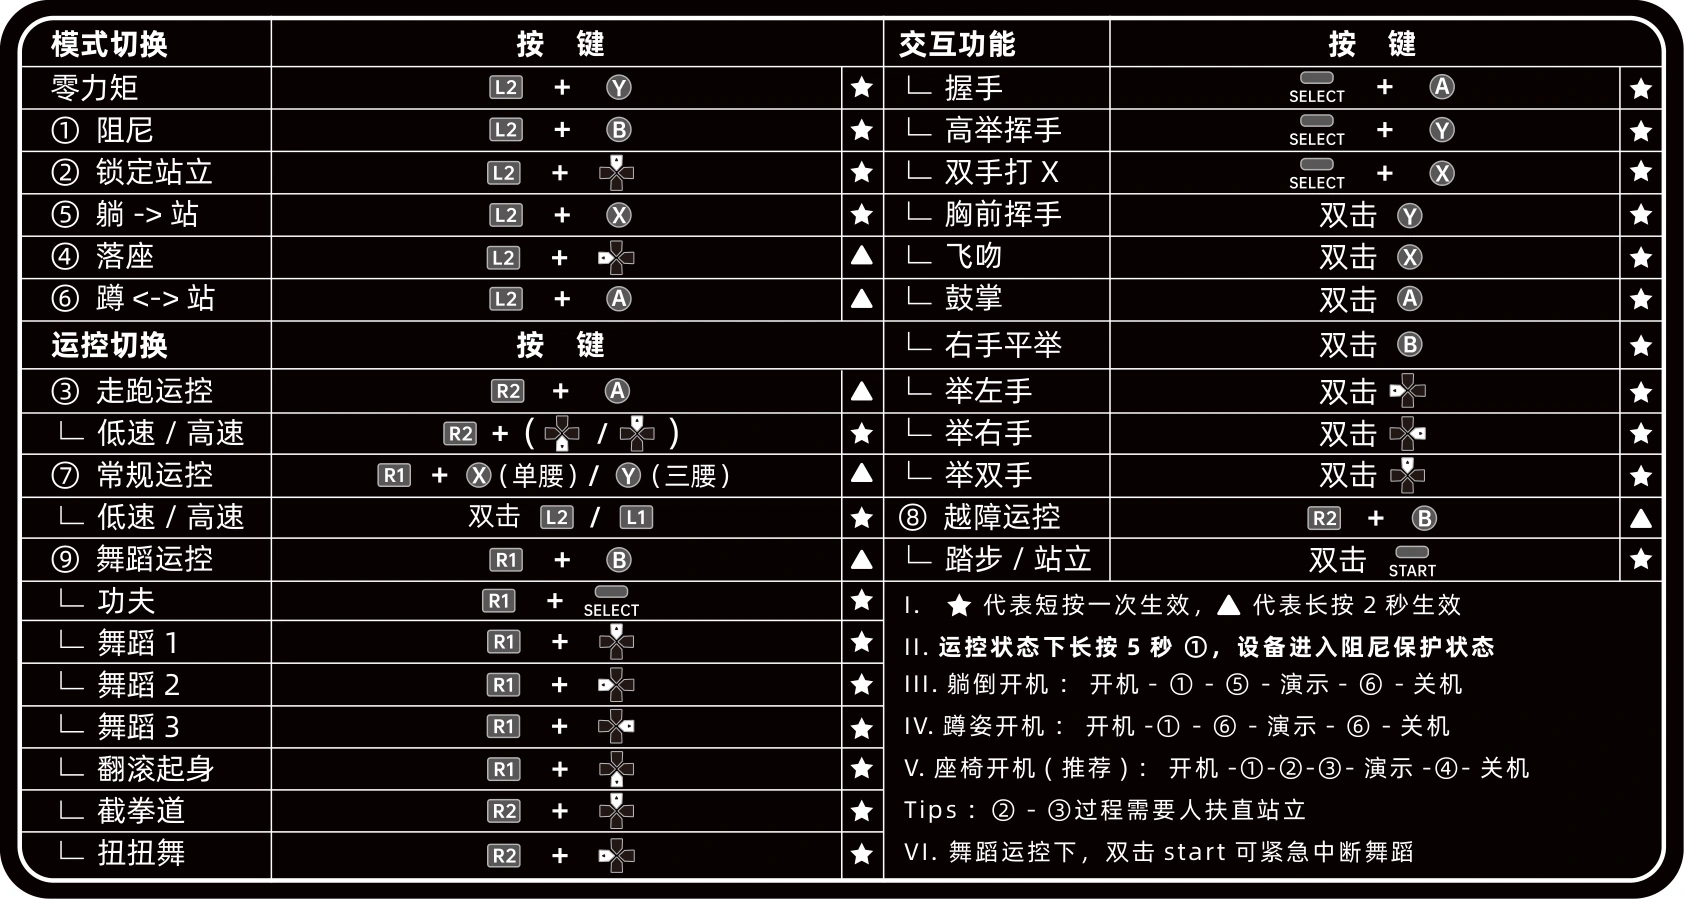
The documented 29-DOF controller configuration includes:
| Command | Action |
|---|---|
| R1 + Square | Dance mode |
| R1 + Y | Dance 1 |
| R1 + B | Dance 2 |
| R1 + X | Dance 3 |
| R2 + Square | Jeet Kune Do |
| R2 + Y | Twist |
| Double press START | Emergency stop in dance mode |
These combinations are firmware-specific. Compare them with the instructions supplied with your robot before using them.
Start with a short dance in a clear area. Some routines require several metres of movement space.
12. Download additional dance routines
- Visit https://unistore.unitree.com/
- Open the available action library.
- Select your robot model.
- Find a compatible dance routine.
- Check its description, compatibility and requirements.
- Follow the installation instructions for the selected action.
- Confirm the action appears in the supported robot interface.
- Test it individually before adding it to a longer performance.
The exact installation interface depends on the action and software version.
13. Install UniUni on your computer
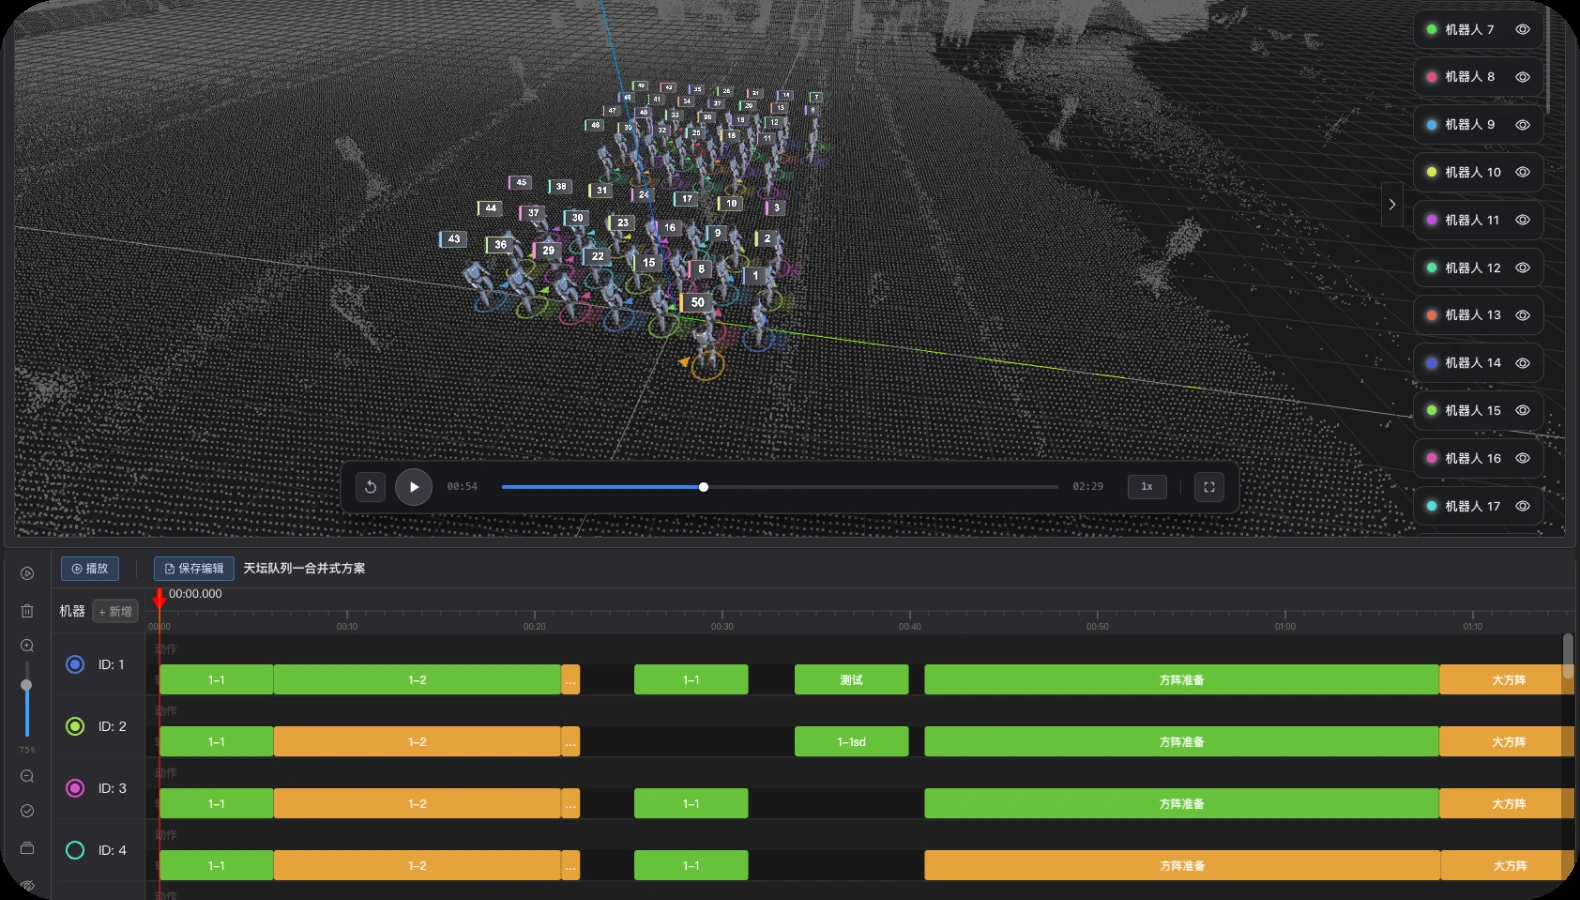
UniUni is Unitree's official visual choreography software for supported G1 and H2 robots.
- Visit https://uniuni.unitree.com/
- Select Windows x64 or macOS Apple Silicon.
- Download the installer.
- Run the installer.
- Complete the installation.
- Launch UniUni.
- Log in using your Unitree account.
- Connect the computer and robot to the same local network.
- Wait for UniUni to detect the robot.
- Verify that it appears online.
The router must support local device discovery and multicast communication.
14. Create a dance performance
- Open UniUni.
- Create a new scene.
- Select your G1.
- Use the Navigation Map tools to map the performance area.
- Save the map to the scene.
- Complete robot localisation.
- Open the choreography workspace.
- Add a track for your robot.
- Open the action library.
- Import compatible dance actions.
- Drag the actions onto the timeline in the desired order.
- Check their durations and transitions.
- Preview the choreography using the available visual tools.
- Save your task.
15. Add music and prepare the robot
- Open Music Configuration.
- Select the audio file for your performance.
- Check the timing of your actions against the music.
- Position the robot at its configured starting point.
- Open Performance Monitoring.
- Select the robot.
- Synchronize the task, trajectory and map.
- Initialize the robot's position.
- Complete the version, map and radar checks.
16. Launch the performance
Select Dance debugging for your first rehearsal. Once the movements have been verified, select Music-synced dance and start the performance.
Keep the emergency stop accessible throughout the test. Stop immediately if the robot loses balance, deviates from its expected trajectory or reports a fault.
17. Troubleshooting
| Problem | Solution |
|---|---|
| Robot not detected | Check Bluetooth, permissions and Wi-Fi |
| Controller not responding | Verify pairing and DL indicator |
| OTA update unavailable | Verify model, account and firmware compatibility |
| Dance routine missing | Check model compatibility and installation requirements |
| UniUni cannot find robot | Connect both devices to the same subnet |
| Robot executes an old routine | Save and synchronize the current task again |
| Robot loses balance | Stop the test and inspect hardware and error notifications |
| Localisation fails | Check the map, radar and starting position |
Sources and methodology
Compatibility notice: Confirm whether your robot is a G1 23-DOF, G1 EDU 29-DOF or another configuration before installing actions. A firmware update cannot add physical joints that the robot does not have.